
When you create a Qlutch site, you'll be guided through an initial setup process that introduces the App Manager. This guide walks you through those first steps, including how to activate a free trial, navigate the interface, and understand the key components of managing your organization's apps and users.
Step 1: Welcome and Free Trial Selection
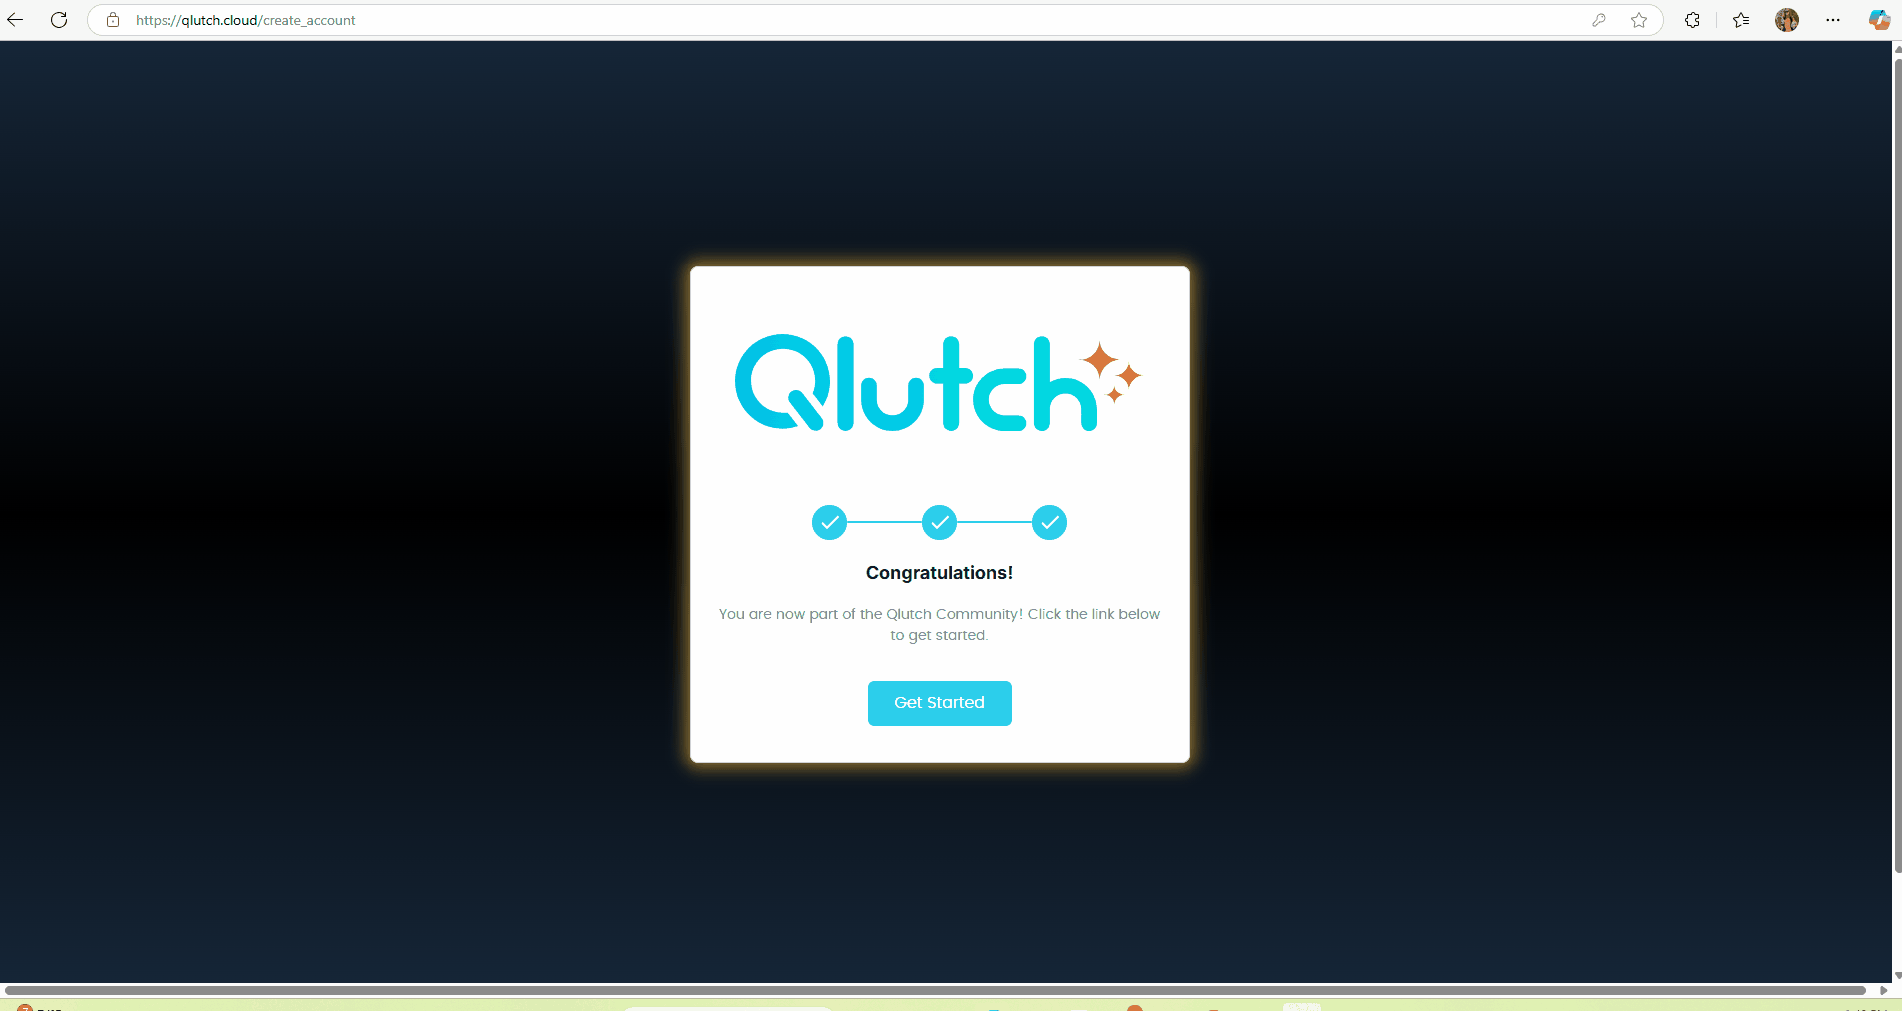
- After you create your Qlutch account, you will see a congratulatory screen
- This screen only appears once, during your initial site creation.
- You must start a free trial for at least one App to activate your Qlutch site.
- Select any App(s) you wish to start a trial for. You can trial others later.
- Once selected, click Submit.
- Your selection determines which apps you, the site Admin, are initially assigned to.
Step 2: Navigating to App Manager
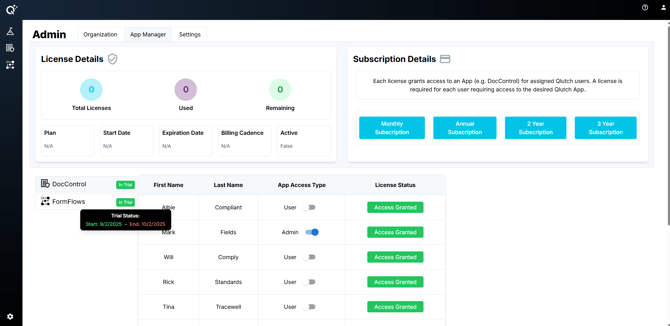
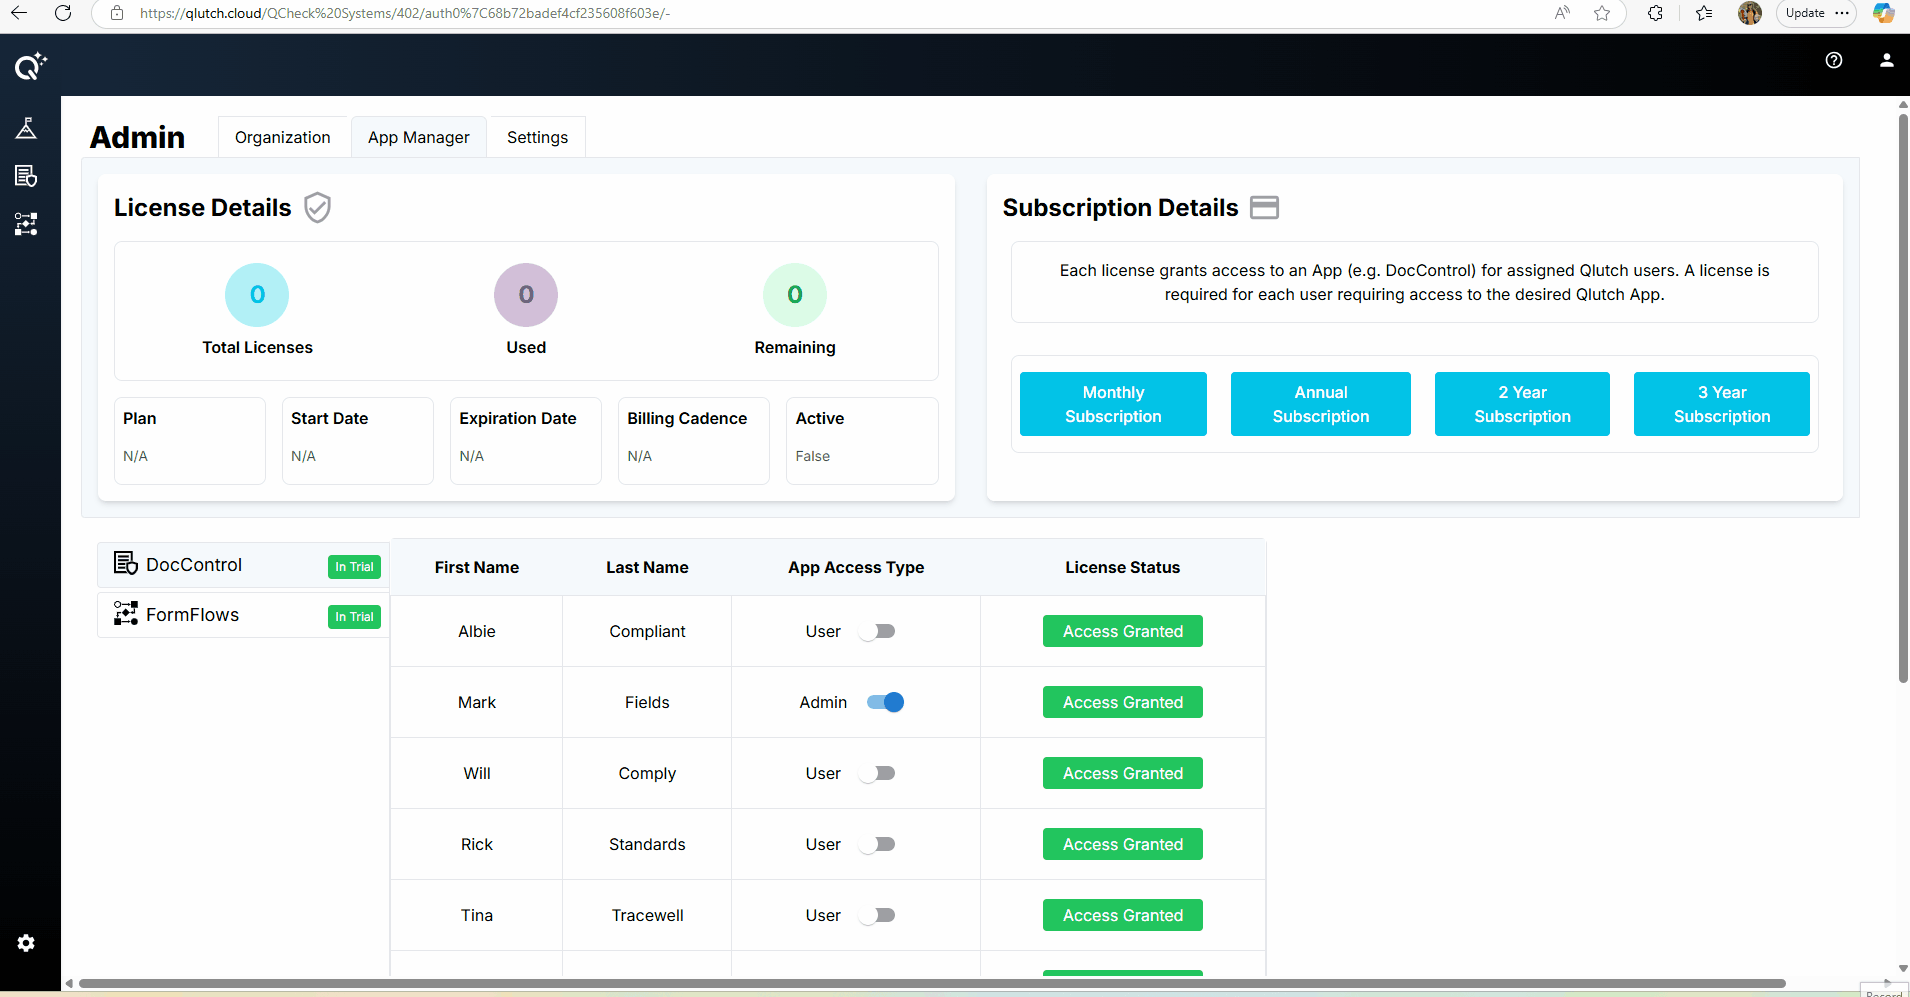
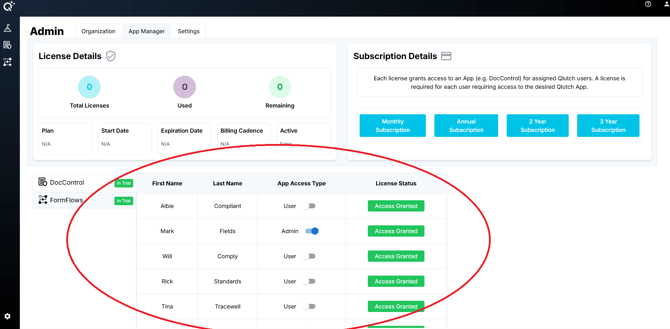
- After submitting your app selection, you’ll be automatically taken to the App Manager tab within the Admin module.
- This area is where Admins:
- Monitor license usage
- Assign user roles
- Purchase and manage app licenses
- You will see the apps selected for trial marked with "In Trial" status
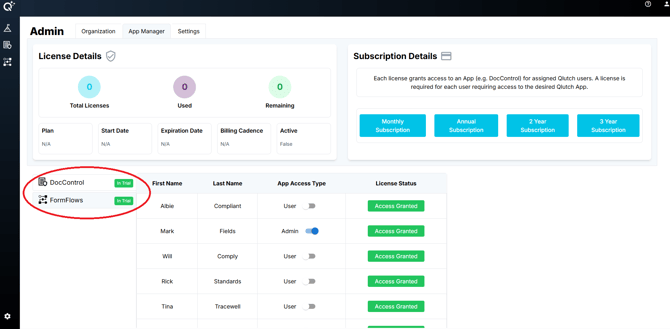
- Hovering over the "In Trial" tag shows your trial's start and end date
Step 3: Understanding App Manager Sections
There are three primary sections:
-
License Details
- Total licenses
- Licenses used
- Remaining licenses
- Subscription plan
- Start/End date
- Billing cadence
- Subscription status (active/inactive)

-
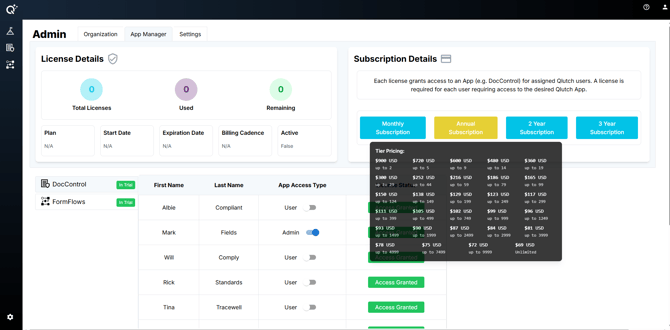
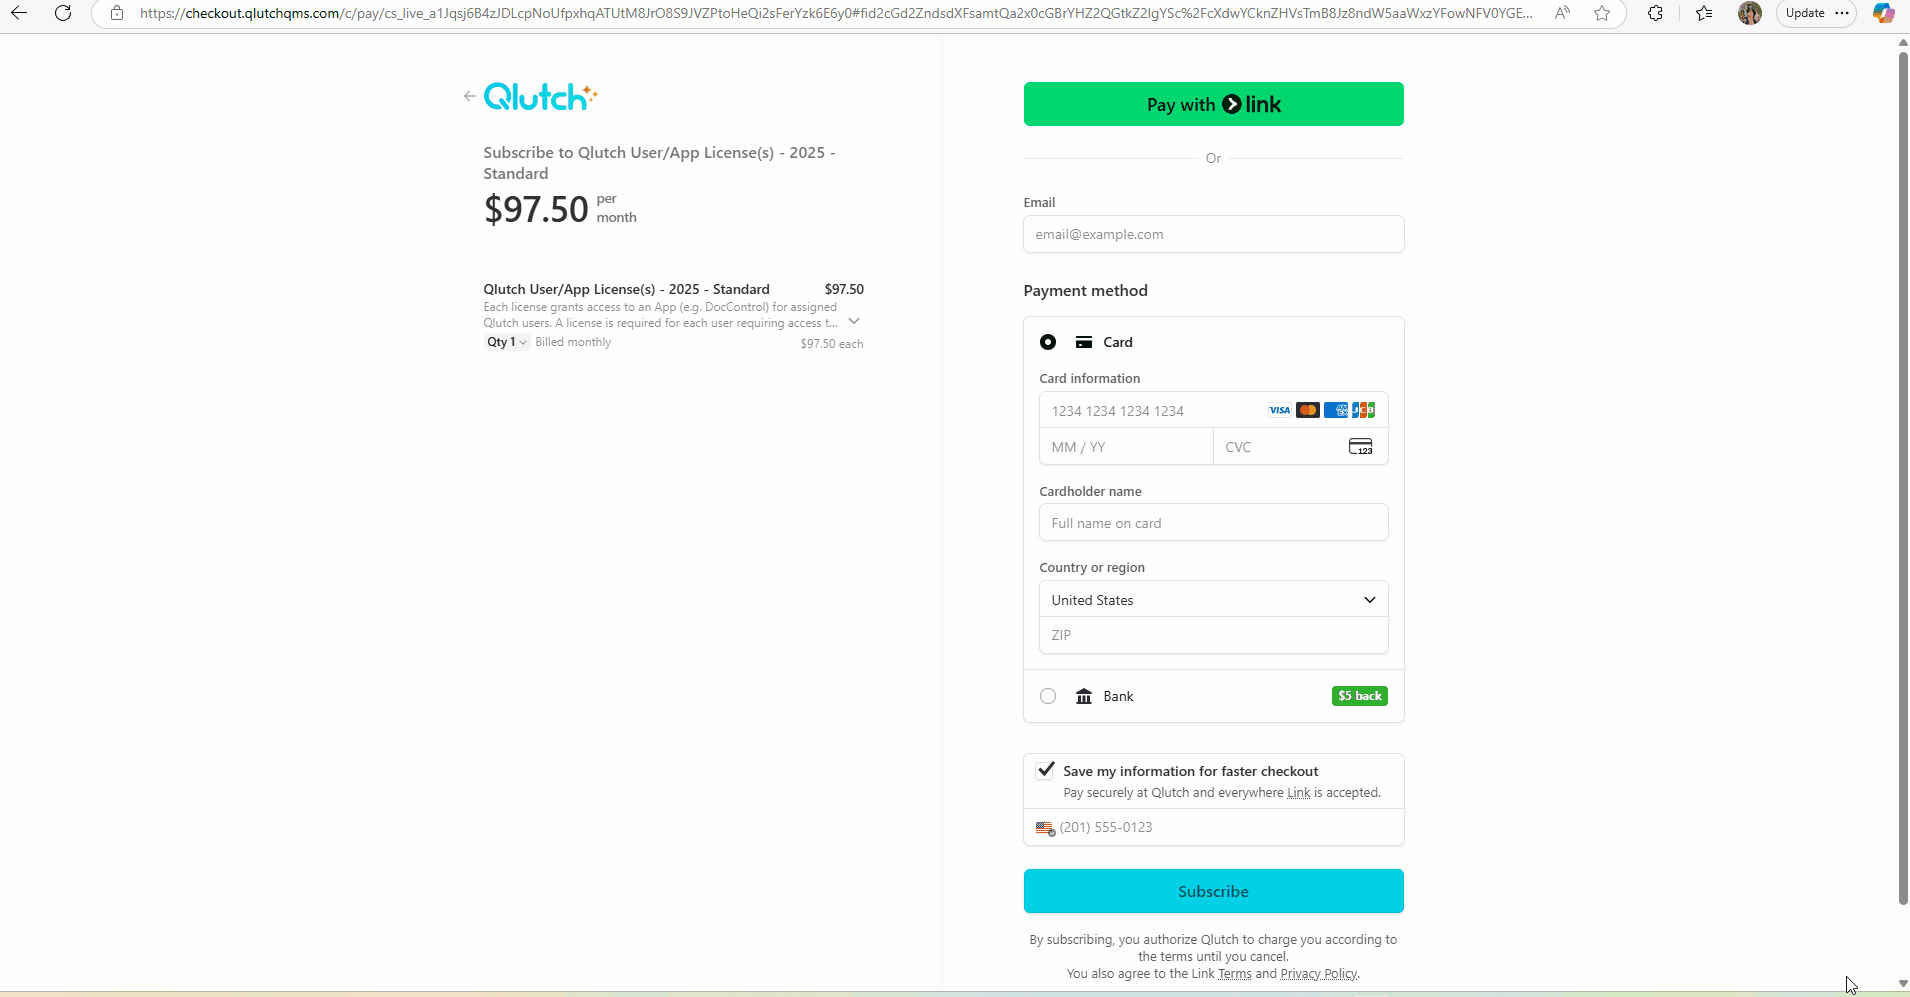
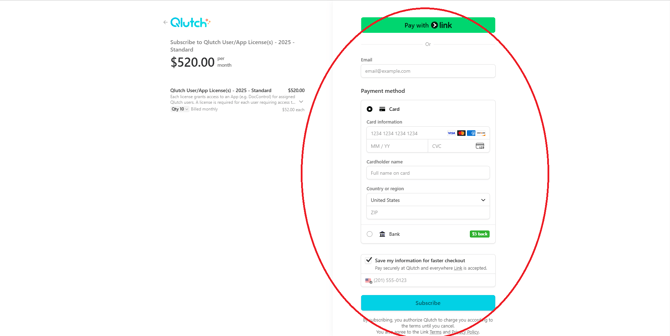
Subscription Details
- Select a monthly, annual, 2-year, or 3-year subscription
- View tiered pricing by hovering
-
- Choose a plan
-
- Enter license quantity
-
- Input payment details
-
User Info Per App
- First Name & Last Name
- App Access Type (User/Admin)
- License Status
-
- Admins can:
- Toggle access type per use for each app
- Admins can:

-
-
- Note: Changing access type does not update other apps automatically
- Remove licenses to revoke access
- Red "No Access" means the user lacks a license. Green "Access Granted" means they have full access.
- Users without licenses may still trigger actions/emails if assigned to roles but cannot access the App.
- All user history is retained. Access can be reactivated later.
-
